Gingerbread Crafts

Gingerbread Crafts
Time for tea.
Showing posts with label sewing. Show all posts

Wednesday, 14 March 2012

But where's my dress with flowers???

In answer to 4 year old Great Niece's question, here it is.


It goes with an apron I made the other day.

Faery Inspiration.

I went out yesterday to buy fabric for my G. Niece's dress, we had decided on purple, found a pretty fabric in the second shop I visited.

The above is also the first photo of my newest machine, my beloved Janome MC 9000 is showing it's age and needs a new screen which has faded so much that the only way to view it is standing up, looking down from a slight angle. The touch screen constantly goes out of alignment as well. I will see about getting it repaired, do love that machine. The Singer replaces my old (24 years) Brother Opus that entered doorstop status late last year.

While I was out I called into a little shop called Inner Forest at Penrith, with the intention of only browsing - really! I took a deep breath as I entered, savouring the heady aroma and atomsphere that engulfed my senses. A plan was formed while I wandered around, the need for Faery Magic in my sewing/crafting room, I want the room to feel magical and be a joy to be in. I discussed it with the shopkeeper and she made some suggestions, she repeated sage several times. Right under the window the room is an old laundry sink that I once planted herbs in, when they started dying off I just left then as being in the wrong spot. They rarely get watered, the rain only hits the front 10 cm of soil. But the Sage and Rosemary have been the only survivors, they are going really well.

The lady showed me some plant resins, which I had already been drawn to and some lovely Citrine pieces, suggesting where to put them in the room for inspiration and abundance.

The room is very cluttered and messy, am constantly rejigging the layout. Swapped a chest of drawers and a table around and think Iam happy with the layout.

I started cleaning the corner I sew in, starting with the window. I've been living here for 12 years and made a discovery - the window lifts out of its track. I struggle with cleaning the outside of the window because the flyscreens are difficult to get out without damage. I was also able to get 12 years of gunk out of the the tracks. The resins are in a shell and along with the Citrine now are on the window sill.

I also fixed the too narrow curtains, by adding the offcuts from shortening them to the sides, now there are no side gaps when they are closed. When the corner was fixed up I set to sewing the dress, even got the overlocker out as there is room to set it up now.

The rest of the room still needs work but it's a real start, this week I will go through my fabric stash and clear a lot of it out. Will take it to the Church for the craft ladies to use.

Sunday, 11 March 2012

Just how do you tell a 4 year old she isn't getting a dress?

Yesterday was asked to make a Great Neice an apron to wear on a trip to Elizabeth Farm. When I asked her Mum what she was wearing under the apron, was told that they didn't have anything suitable and she would be wearing it with her school uniform. So of course I couldn't let that go, I hunted through my stash of patterns and fabric to make a dress for the outfit.

The pattern was Butterick B5119, sadly a now discontinued pattern. The fabric was picked up from Spotlight off the discount/discontinued tables. Am thinking that making an old fashion costume using discontinued supplies is appropiate.


The dress and apron. The apron I put together myself without a pattern, it was very easy to do.


Had been asked if I could make an apron for the younger sister as well, her Mum said she would be happy with just the apron. I was working on it this afternoon after dropping off the outfit. They came over to show how great the outfit looked on, the 4 year old wanted to stay to watch me working on it. She had lots of questions, each answer I gave resulted in "Why?". When I told her that it she will have it tomorrow, she asked "where's my dress with flowers?". Hmm, so much for being happy with just an apron. Looks like I'll be making another dress.

Thursday, 23 February 2012

Ironing Board


A few years ago I decided to design and make my own ironing board cover, after struggling with ill fitting commercially sold ones, that were always made with substandard (read crappy) fabric ones. The commercial padding was never good enough, mostly too thin, not wide/long enough for my STANDARD sized ironing board. I even made a tutorial of sorts on another blog and after looking back, realising that it's now been 4 years and that ironing board cover is still going strong I thought I would rejig it for here.


Started off with the issue of not having enough padding, I already had a piece of old woollen blanket but needed more. Used an old damaged mattress protector that was laying around. Really disliked the way that the old padding constantly moved around at the pointy end of the board, so I made a deep pocket for that end.

Fold over end and pin

Traced and cut out leaving enough excess to cover board edges and underneath.

Ironing board cover

Stitch and turn right side out. It needs to be a fairly firm fit, I first sewed on the pinned marks, then added another row of stitching a little further in to tighten the fit.

100_6022

Used elastic to bind edges, remembering to pull elastic firm while stitching to elasticate the edge. Photo shows cover being sewn but same technique was used on padding. Fitted sheet elastic works well, it folds over the edge.
Elastic

Decided that it needed more padding so added a piece of old woollen blanket and stitched it to the frame to prevent movement.


100_6040

At the corners added elastic straps to ensure the cover stayed in place

corner.

Completed

100_6023

100_6025

The fabric cover was completed in the same way, the photos below show the old foam padding being used as a template.

Fabric ironing board cover

Cut out

Elastic

Just read my notes, mentioned that the elastic was too loose on the cover, the corners weren't tight enough. Apparently I was going to change it out for a casing and drawstring, but until I did that I just safety pinned it in place. Ummm the safety pins are still there.

Excess fabric safety pinned out

Ribbon was added as support ties where needed.


Ribbon tie to pull sides in more.


Just about every stage of the making of this was overseen by the cat, who has claimed the ironing board as her throne, laying claim to each of the stages in the name of Catdom. To this day if the ironing board is up she makes a running leap on to it and spreads herself all over it. We get the dirtiest of looks when we remove her and all the cat hairs so we can use it. As soon as we move away she's up there, rubbing herself all over it to show us that it is hers.

I claim this in the name of Catdom for the benefit of all catkind Claimed in the name of Catdom as well

I liked how cheap this was to make, the only thing new used was the fabric, it was only a couple of dollars per metre. I had already purchased a new protector for only $10, which is still really cheap if you have to buy one for the project.

Tuesday, 24 January 2012

Sassy Skirts

I was looking in my wardrobe yesterday and realised that I now have more skirts and dresses than I ever had. Maybe I'm finally becoming a lady.

I really like the feel of a long swishy skirt, I remember when I was young Mum asked Nanna to make us dressy outfits and I told them I wanted a Maxi Skirt. My sister and I got matching outfits in different colours, floral print skirt and bolero, along with long sleeved lace blouse. Mum arranged a professional photographer to come to our house, I'll have to find the photos.

For a long time I barely had a skirt in my wardrobe, then they started filtering in beginning with black crushed velvet one and a blue cargo style, about 12 years ago they are still in my wardrobe, waiting to be dieted back into. It's only in the last couple of years that skirts have played a major part in my life. I like swishy ones, the longer the better.

I've been buying a lot of my skirts from Tree of Life, long, tiered and very comfortable to wear. And there is the hope that the company is doing good for third world countries. I know I could easily make my own but the fabric isn't so easy to find.

My latest purchase was a long purple skirt, I had bought the style before but getting home I remembered why I hadn't worn it often, it's very sheer. Great for hot day around the house but standing in front of any light source left nothing to the imagination. I wear long skirts to cover my legs not highlight them.

Found an almost perfect match in cotton voile at work to make a petticoat with, was going to just run up a straight slip and hope for the best. Then remembered had a book with skirt patterns, Sassy Skirts and found the perfect pattern, perfect size too. Traced off the pattern, using my lightbox (aka my back door - was asked why I taped the pattern to the glass) and stitched it while watching Time Team. It was almost perfect (my favourite word lately), I made it a little short for my liking. Hemming it would have made it too short so while I thought about what to do wore it and the skirt to the shops. The pattern is for a longer skirt but I wanted it shorter and cut off too much.

It only had to be 5 cms longer so I simply added a band of fabric later. Things I would do different for the next one is to rethink my elastic choice, the one I got didn't have a great rebound so it stayed a little too stretched. I'm thinking it's a little too old, it's not a great seller at work and had probably been sitting on the shelf for over 4 years.

There are several different styles, straight and tiered, fitted and elastic waisted, it's a great book with full sized patterns ready for tracing off the master pattern. The instructions are easy to follow. Have also made a tiered skirt which came together very well. I highly recommend this book

Sunday, 18 September 2011

Why you should always wash fabric


I found this delicious apron pattern yesterday, a free tutorial complete with printable pattern. I do loves my freebies. I want to make this for my niece as a Shower Tea gift, ooh and one for me too. Bought red/white and white/red spotted fabrics today. Click on photo for link.

With my washing machine looking like this at the moment, I was going to forgo the washing of the fabrics but had second thoughts, thankfully.


The below pictures were taken on the third rinse, after intial washing and 2 salted rinses. The salt is supposed to help set the colour. The below colour is good compared to the first wash, imagine about 10 shades deeper.


I've left it soaking while I enjoy this, a Soy Chai Latte.


Monday, 11 July 2011

Sunrise

Last night worked on my stretch velvet redingote, procrastination raised it's ugly head but I finally got around to it - late though I had thought I wanted to wear it today but no go. I added pleats to the skirt - adding 14 inches to to the skirt back, it was easier working in inches. Got the sides stitched and attached the bodice. Am really pleased with it.

As mentioned I had hoped to wear it today but had some unpicking to do, I tried covering the raw edges with bias but it didn't sit right. When I noticed it was after midnight I figured it was time for bed.

This morning my plan was to see a sunrise in the mountains, so was up at 5.30. The sky was starting to lighten when I left, got just beyond Springwood before I noticed the first rays of sunlight.

Stood in the cold wind for a few moments before heading to the car, put the driver's window down to get full effect of the sun. I closed my eyes and noticed that the after image of the sun was emerald green, the colour of Archangel Raphael and healing. One of the things I noticed was that after a while with my eyes closed, could see mostly darkness apart from the image of the bright sun, it was like a torn piece of the darkness. I could actually see trees, sky in that tear, not part of the view that I was sitting in front of because in my vision there was a river. Don't have an explanation of what this was, it was just amazing.

Afterwards I drove up to Katoomba, the wind there was viciously cold and strong. Took a few pictures of the amazing colours which the photos didn't do justice. Then I went back to the car for a half hour nap, then into town for a lovely breakfast.


On the way back I called into Springwood for some shopping. Bought buttons, fabric and a bag pattern at a sewing store. Then on to Frou Frou, found a journal and a red velvet thingy there. The thingy was some sort of valance, think for a table, I loved the fabric. A jumper and a scarf completed my purchases from Birney's. Spoilt myself completely with tea and cake at a cafe before heading home.


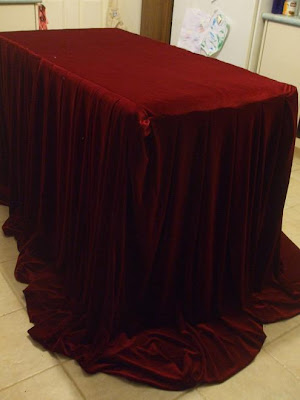
Update: Here is the thingy on my kitchen table, it looks way too cool to cut up. I think it would look stunning on a market stall, if ever I get around to doing one.


Sunday, 19 June 2011

Stretch velvet day 2

Having experienced sewing with Crushed Panne before and without the greatest results I figured it a good idea to look for tips in sewing stretch velvet, this was the best I came across Stretch Velvet Sewing. Though after spending time basting seams, something I rarely do, I wasn't pleased with the seams so I took out all the basting and pinned instead. Much quicker.

It was recommended to use a walking or roller foot, I just so happen to have a walking foot.


The foot installed, it's arm sits over the needle screw and when the needle raises, it lifts the arm which works the walking part of the foot.
Test sewing, the first sample the stitches are too small, the fabric puckering and the seam gaping, with longer stitches - 3.5 setting on my machine the seam lies flat.
I finger pressed the seam open, I don't think pressing was needed. I was worried about crushing the pile or burning an image of the iron into the fabric.

Shoulder seams were taped, I only had extra wide tape so cut it in half. Didn't want to risk it shrinking so I wet and then ironed it dry. The taping will prevent the shoulder seam from stretching and should be done on all stretch fabric shoulders.

I hadn't done any fitting and ran the risk of it not fitting, was very pleased at the first fitting and found it fitted quite well. When the band is added to the centre front it will do up nicely.


My next dilemma is deciding what to do inside. I don't want to overlock (serge), had thought of Hong Kong seam finish using satin bias binding or even just turning the cut edge of the seam under it's self. I may just line the bodice if I can find the fabric for it.

Saturday, 18 June 2011

Sewing with Stretch Velvet. Sort of tutorial.


Recently I decided I wanted a stretch velvet coat or jacket, it started with some velvet cushion covers at work and a day or so later a friend mentioned wanting a green velvet jacket. I had a clear vision of what I wanted in deep red or purple. The covers came in a divine purple.

I found the stretch velvet fabric in spotlight, waiting till I could use a discount voucher, I could only get the purple but yesterday I found the red in a different branch. Will see how this one turns out.

Pattern pieces, pressed and cut out - always on the line, not inside or outside but so you can see the line. Cutting either inside or outside the line adds extra dimensions, making the finished article smaller or bigger, pieces won't fit together accurately.
Fold stretch velvet in half lengthways, pin within the selvage edge to keep from sliding. Fold with velvet on the outside, it prevents the pile catching on it's self.


Layout pattern pieces, I have not followed layout in pattern instructions, because I bought more fabric.
To ensure grain is correct, measure from grain line to selvage edge, from the base and top of grain line.
First cut, I bought new scissors for the task - always use sharp scissors and never ever cut paper with your dressmaking scissors. It actually blunts them, it's the same in reverse too, don't cut fabric with your paper scissors. And do not under any circumstances ever cut the cat's stitches with dressmaking scissors - I don't care if stitches are classed as sewing. Mum do you hear me? You can see I pinned the piece, only pin in seam allowance, velvet is unforgiving and can show pin marks.
Nick into positioning marks - do not cut the whole triangle out a straight nick from centre of mark to tip of triangle is all that is needed.
Blurry picture of a tailor's tack, instead of using chalk or marker to mark each point I stitched tailor's tacks. To do this, put a threaded needle straight into centre of circle mark, do not lean it to the side it must be straight. Pull thread through leaving long tails at both ends.
Gently pull apart fabric without pulling stitches out.


Cut thread. Each thread marks a fitting spot and corresponds with another mark on another piece of pattern.

I only cut out the bodice tonight, I want to work on those before cutting out the sleeves and skirt of the coat. If at any point you get tired don't keep on, tiredness brings on mistakes and mistakes on velvet can be costly.

To be continued.

Sunday, 29 May 2011

Redingote

WOW I am on a roll today, 3 posts, I am inspired.


The other day a friend posted on Facebook that she was after a green velvet jacket and it got me thinking that I would love a velvet jacket or coat too. Had a definite picture in my head along with the colour either purple or burgundy. I didn't know what the style of coat was called until I came across the word Redingcote on a link, I clicked it to see what it meant and found out what I was after was just that, also known as a Riding Coat.


The next thing was to get a pattern, that was either exact or adaptable. Didn't find much in the mainstream pattern companies so I put it to the back of my mind for a while. My daughter had been sitting at my desk and had left a pile of patterns, I glanced at each as I added to another pile - the last one was a classic coat pattern that looks perfect to adapt. It's a discontinued patten.


The lower part needs a lot more flare, my image has extra fabric in the back, possibly with gathering at the waist of the centre back panel.


A quick search for Redingote images just brought up a beautiful coat with flares in each of the panels, just lovely. I found the picture at Indie Fame- the plus side of DIY.


I love this coat even though it's not what I have pictured, there's no reason not to make 2 coats.