Gingerbread Crafts

Gingerbread Crafts
Time for tea.
Showing posts with label free pattern. Show all posts

Wednesday, 11 April 2012

Crochet and Felted Slippers

Over the Easter break I decided to go through my yarn stash to see what I had and to neaten up tangled balls. We drove to Kiama on Friday and I kept myself busy untangling a ball of cotton thread, didn't fall asleep once nor did I feel carsick. I untangled the last knot just as we drove into town an hour and a half later.

The weather was lovely, a little too cool for swimming, we watched the Blowhole for a while, it wasn't blowing very high and then with ice cream in hand walked along looking at boats. As we walked a lady pulled me up, telling me that the dress I was wearing was amazing. It made me feel great, but then my husband and son kept teasing me about my amazing dress. We took a short drive around town and followed a sign to the Little Blowhole. We found it better than the big one, it came out of 30cm (approx) hole and shot up high. Could get as close as you wanted to it, I got a little too close standing just on the outside of the veiwing platform when it sent the biggest plume up, I got soaked, my husband and son teasing me for getting my amazing dress wet. I didn't mind especially as they both had their cameras pointing away from me at the time.


As I was sorting through my yarn stash I decided I wanted to knit socks using some of my homespun wool but didn't have the right sized needles for it. Instead I crocheted slippers using Lincraft Surprise Yarn.


Basic Slippers.

1 ball Lincraft Surprise Yarn.
Using 5.5 mm hook

Pattern below fits size 7 -8 foot.

TR (Treble) is the Australian version, this stitch is known as DC (Double Crochet) in USA patterns.

Row 1: Magic adjustable ring, 3 ch, 5 tr into ring. Pull ring tight, join to 3ch with slip stitch. (6 stitches

Row 2: 3ch 1 tr into same stitch, 2 tr into each stitch , join with sl st (12 stitches)

Row 3: 3ch 1 tr into same stitch, 2 tr into each stitch, join with sl st (24 stitches)

Rows 5 -11: 3ch, 1 tr into each stitch. Try on slipper to see if you are happy with fit, add or decrease rows if needed.

Row 12: 3ch, turn work, 1tr into second stitch from hook, 1 tr into next 18 stitches (20 stitches)

Continue on for 9 more rows - again check for sizing, adding or decreasin rows for fit.

Finish off with slip stitch, cut thread leaving about enough to sew and to crochet around opening, I left about a metre of thread.

With slipper inside out, lay flat and stitch back opening closed. Stitch back up seam so the thread is at the heel opening, make loop with the thread and DC (SC in USA) into end of each row and stitch around foot. Sl ST closed, 10 ch, sl st into last edging stitch. This makes a loop that could be used with a ribbon to tie around ankle if wished.

With Surprise yarn it's always a surprise how the colours come out , I got three Slippers from one ball, the top is the first and the bottom is the last. The first 2 looked similar in colours because I purposely cut and joined the yarn. The third will be used as a display piece at work.


With the success of these Slipper/socks I was inspired to try a felted version using Lincraft Cosy Wool.

Using the basic pattern and working in DC , not TR - (half dc USA), I guesstimated the sizing, using size 5.5 hook and starting the first round with 8 stitches, second round at 16 stitches and third at 32 stitches. The toe section was 15 rows. With the foot/heel sections at 24 stitches and 11 rows long. Needs another row or two for proper fitting.

Before felting
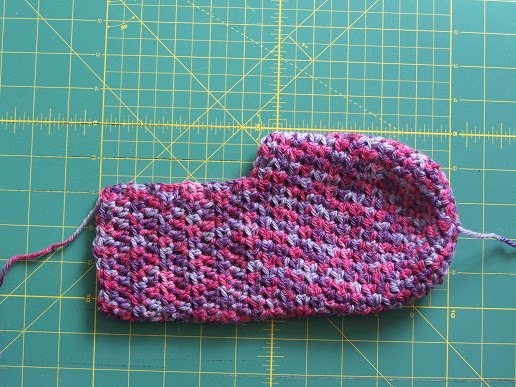
After felting. After 5o minutes in the washing machine with a towel at 60 celicus, the width shrunk over an inch while the length shrunk about 1 inch.

The final product ended up being pretty much exact size as the basic slippper but because there is no stretch with the felting it's a little too small lengthwise for my foot. Will be adding a seperate heel piece later.


Saturday, 10 March 2012

Free Apron Patterns

I've been asked to make a couple of aprons today for my Great Nieces, one of whom is going on a school trip to a historic house. She needs to be dressed up with a mob cap and apron, just a basic bib and skirt style. I googled it but haven't been able to find a pattern for the style, easy enough to make one up myself.

I did find lot of free patterns some of which I wanted to share here.


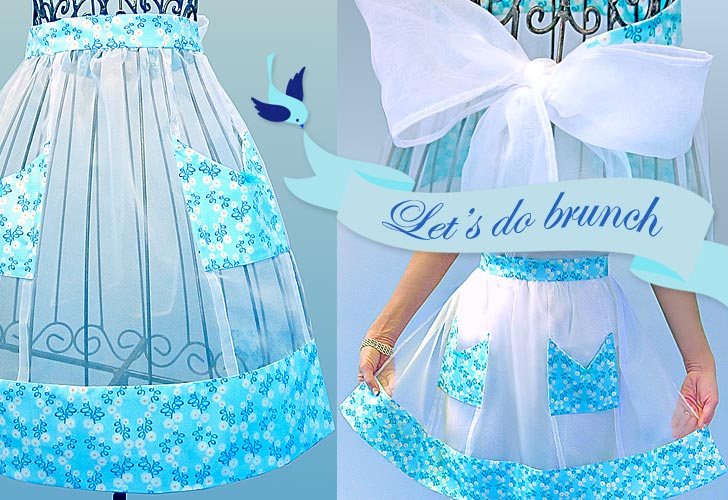
Let's do Brunch, totally impractical but so elegant


Retro Fun, my favourite, have 2 waiting to be finished


Friday, 25 November 2011

Christmas Gifts and Crochet Barbie Dress

To keep Christmas spending down to a minimum this year I've decided that most gifts will be handmade. I say that every year but this time it's more of a necessity it's either that or no gift giving.

I have our parents, siblings, nieces, nephews and a growing number of great nieces and nephews. We don't really swap gifts with my husband's family, just his parents and a brother or two. Husband has already bought gifts for his brothers. Oh and one of his nephews family who just happen to be neigbours of ours.

I want to stick with supplies I already have on hand for the most part. I've started with a cute crocheted Elephant for a 1 year old great niece, at the moment it's waiting to be stuffed and sewn, perhaps a dress for her as well.


For her 5 year old sister and 4 year old cousin, it will be Barbie Dolls and dolls clothes. The Barbies have been in my stash for ages, I bought them a few years back to make Christmas Angels with. Was going to use Originals by Gidge designs

This dress was inspired by a pattern that was originally on Originals by Gidge. I only had 4ply cotton on hand so thought it would look fine sized up. Was going to make a long dress with bodice but during the first fitting of the skirt part, I tried it out as a strapless dress. Hmmm liked it.

Crocheted Barbie Dress.

4ply cotton
2.5mm crochet hook

Chain 7
Row 1:
1 dc, 2 ch, 1dc into 5th chain from hook, 1 dc into last ch. 3 ch, turn

Row 2:

1 dc, 2 ch, 1 dc into 2 ch space, 1 dc into top of turning chain. 3 chain, turn

Row 3.

Repeat row 2.

Row 4:

2 dc, 2 ch, 2 dc into 2 ch space, 1 dc into top of turning chain, 3 chain, turn

Row 5:

Repeat Row 4

Row 6,

3dc, 2 ch, 3 dc into 2 ch space, 1 dc into top of turning chain. 3 chain, turn

Rows 7 & 8:

Repeat row 6

Row 9

4 dc, 2 ch, 4 dc into 2 ch space, 1 dc into top of turning chain. 3 chain, turn

Rows 10, 11 & 12

Repeat row 9

Row 13:

5 dc, 2 ch, 5 dc into 2 ch space, 1 dc into top of turning chain. 3 chain, turn

Row 14:

Repeat row 13

Row 15:

6 dc, 2 ch, 6c into 2 ch space, 1 dc into top of turning chain. 3 chain, turn

Row 16: Final row.

Repeat row 15, except for 3 chain, finish off. Leave enough thread for sewing panels together - 20 - 30 cm.

Repeat the above 4 more times, 5 panels in all. Do not finish off on final (5th) panel, leave thread on hook. Do not cut thread.

Laying panels flat side by side, just butt the edges together and join with simple overcast stitch, don't worry about taking small stitches, the lacy effect hides the stitches well. I stitched each panel as I completed them, saved having to make a new panel when one mysteriously disappears. As they do, trust me I know. Happens to me all the time, things just disappear.

Stitch 5 panels together to form flat piece.


With hook and remaining thread.

1 ch, sc up the edge of final panel, I did 2 sc per "hole" and 1 sc into edge of each shell. At the top turn corner by stitching 1 chain and then sc across top of all panels, 1 ch to turn and repeat down the edge of the first panel. Finish off, leave enough thread for stitching.


Stitch to about 3 cm below top and finish off. Sew press stud, velcro dot or button and loop for closure. Straps can be added if needed.